Loading...
Loading...
Loading...
Loading...
Loading...
Loading...
Loading...
Loading...
Loading...
Loading...
Cloud Desktop Container uses a custom docker image. The Dockerfile
is located here.
There are 3 main components in the container image,
VNC server paired with a NoVNC server
VSCode server
Tailscale client
Catkin Workspace: /my_ros_data/catkin_ws
Ports:
novnc
80
vnc
5900
vscode
8080
The current container image is structured this way:
cosi119/tb3-ros
Installs ROS melodic and ROS packages
Installs custom packages used in class, like prrexamples
cosi119/ubuntu-desktop-lxde-vnc
Provides a Ubuntu image with novnc and lxde preconfigured.
Provides a CUDA enabled variant (image with -cuda
tag suffix)
Each of the components are managed by a process control system called supervisord
. Supervisor is responsible for spawning and restarting these components. For detailed configs, see supervisord.conf.
Modify the supervisord.conf
under tb3-ros/tb3-ros/files/supervisor/supervisord.conf
.
As of version 2.1.1
,
turtlebot3_msgs
turtlebot3
turtlebot3_simulations
https://github.com/campusrover/prrexamples
https://github.com/campusrover/gpg_bran4
To add a package to the default catkin workspace, modify the Dockerfile
under tb3-ros/tb3-ros/Dockerfile
:
The cloud desktop architecture is simple. On a high level, it looks like this:
Cloud desktop cluster is a cluster of cloud desktops. It is implemented as a K8s cluster for easy scheduling and orchestration of cloud desktop containers.
The cloud desktop container provides a virtualized desktop environment that is isolated and portable. It consists of 3 components.
VNC server paired with a NoVNC server
VSCode server
Tailscale client
For details, see Container Image.
K8s network:
Used for communication with the load balancer to allow each container to be accessible from a URL
Implemented with Flannel
Tailscale network:
Used for communication between cloud desktops and robots globally
Managed with Tailscale Dashboard
AWS Route53:
Provides DNS records for redirecting traffic to the cluster
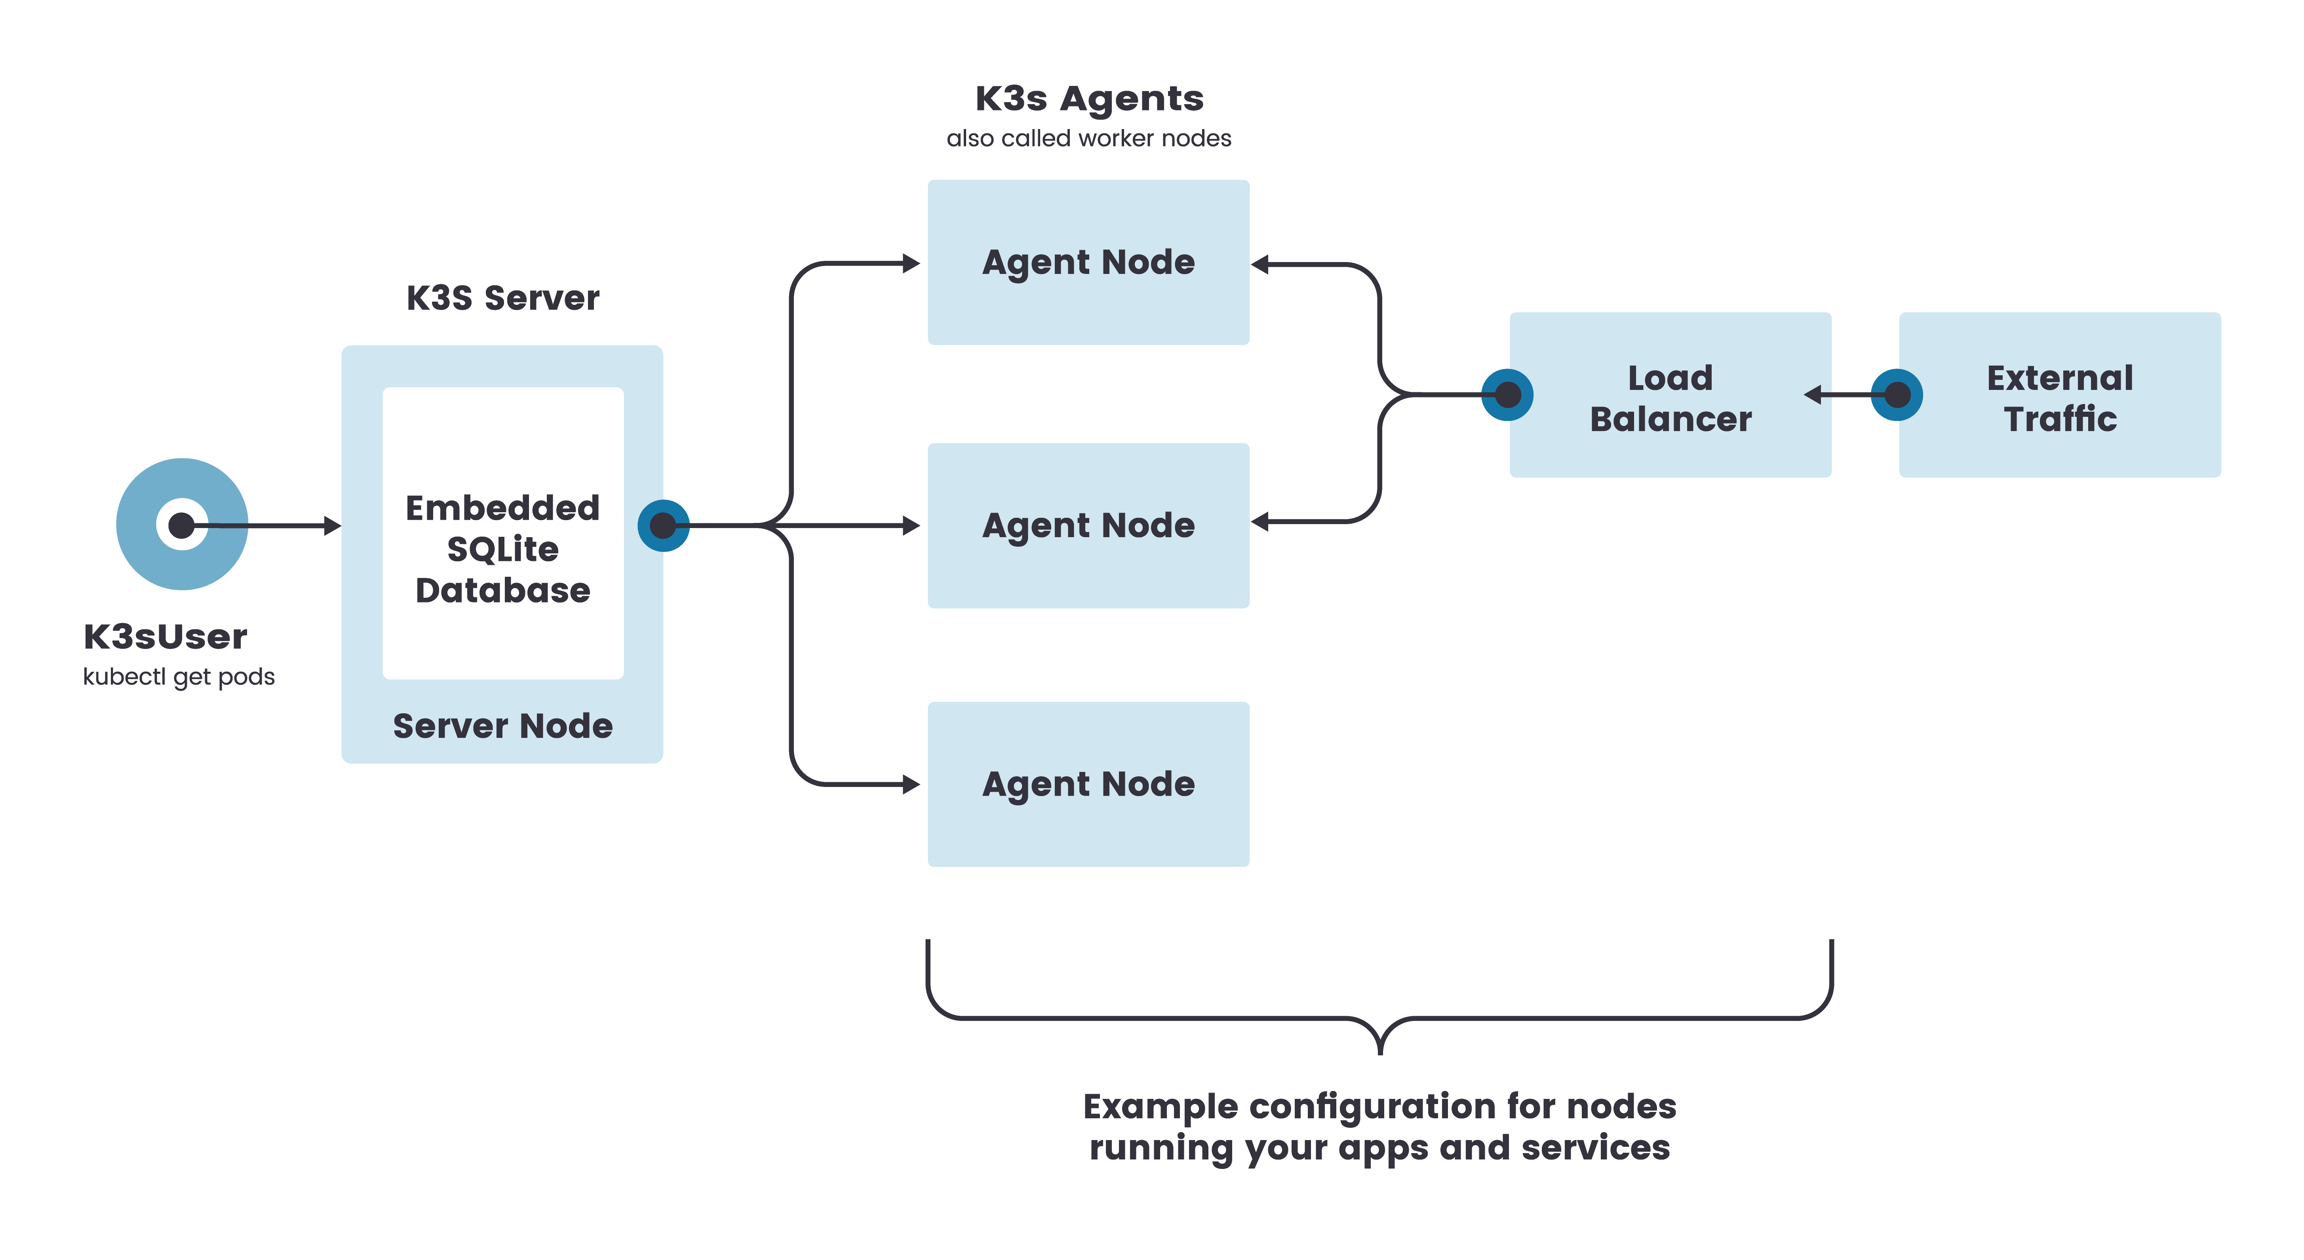
Cloud Desktop cluster is managed by Kubernetes. Specifically, it is a distro of Kubernetes named .
For cluster management, see .
We use to run our k8s cluster. While leaving most configurations as default, we made the following customization,
container runtime: docker
clouddesktop-prod
Main namespace
Used for all active cloud desktops
clouddesktop-dev
For testing cloud desktop images
The default networking backend is flannel
with VXLAN as backend.
The default ingress controller is traefik
.
The default storage provider is local-path
. In other words, we store all cloud desktop files locally on the node.
As of May 2021
Read .
Read .
Read .
Read .
Yes, but make sure to drain the node first. To drain the node,
After the reboot, k3s
will be started automatically. If it is not started,
If a group or all desktops are not connecting,
If only 1 desktop is not connecting,
To make sure that new desktops are receiving this update, modify the deployment template under .
robotics-rover1
Master
robotics-rover2
Agent
robotics-rover1
Ubuntu 20.04.1
v1.19.5+k3s2 (746cf403)
Docker version 20.10.1, build 831ebea
robotics-rover2
Ubuntu 18.04.5
v1.19.5+k3s2 (746cf403)
Docker version 20.10.1, build 831ebea
robotics-rover1
rover1.cs.brandeis.edu
12C/24T, 32GB, 1TB, RTX2060S
robotics-rover2
rover2.cs.brandeis.edu
12C/24T, 32GB, 1TB, RTX2060S
All the source codes of Cloud Desktop is distributed in the following GitHub repos,
Cloud Desktop Image https://github.com/pitosalas/tb3-ros
Cloud Desktop K8s files https://github.com/campusrover/clouddesktop-k8s
Standalone Cloud Desktop https://github.com/campusrover/clouddesktop-docker
kubectl
Installation Guide
terraform
Installation Guide
AWS Credentials to AWS Route53
Access Key
Secret Key
First obtain the users repo from here.
Setup .env
file by filling in all required fields:
It's better to use an IAM user group
to create a new user
associated with the clouddesktop
user group. It will generate a access and secret key for you to put in the above file. The ingress IP is the ip address of the main node. Once everything is properly setup, do:
Setup terraform:
To under what each of these commands do under the hood, see here.
id
is the ID of the new user.
Warning: This will remove any persisted data!!
For user example
, modify the file example-clouddesktop/deployment.yaml
.
For detailed explanation of what units you can change it to, see here.
Note: Beware if we have enough free GPUs in the cluster
Note: Make sure the docker image is a CUDA enabled variant (ie. tb3-ros:v2.1.1-cuda
)
Warning: This will restart the cloud desktop container!!
To apply the previously changed values,
To restart a desktop, you need to delete and redeploy the desktop.
This will NOT lead to loss of data.
We administrate all our operations through the use of kubectl
.
Read up on the following materials,
kubectl
Installation Guide
To access the K8s cluster, you will need to have a k3s.yaml
credential file. It can be obtained by ssh into the master
node of the cluster, under the directory /etc/rancher/k3s/k3s.yaml
.
Once you have obtained the k3s.yaml
file, make the following modification,
After the modification, this file is ready for use. Update your shell to always use this file,
To confirm it working,
Notice that -n clouddesktop-prod
refers to the clouddesktop-prod k8s namespace